Connect Multi-clock System Over the Internet – RTC-1000 Universal Time Clock
KB0138: Connect Multi-clock System Over the Internet – RTC-1000 Universal Time Clock
Solution:
NOTE: If you are not familiar with your network, have your network administrator or Internet service provider help with this procedure. Only RTC-1000 clocks can be setup in a multi-clock system.

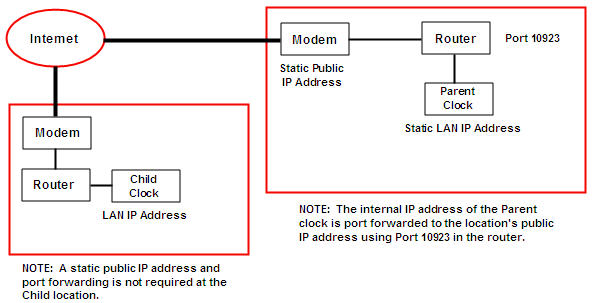
- Program an available static IP address for the Parent clock and verify that you can log into the clock on that local area network. Follow the instructions at this link:Setting up a Static IP Address
- Determine the public IP address of your router. This should also be a static IP address. This link will display your public IP address: What’s My IP?
- Port forward the Parent clock’s local IP address to the public IP address using port 10923 in your router.
- At the Child clock location, make sure the RTC-1000 is assigned a valid local IP address.
- Press the Lock button on the keypad of the clock.
- Enter the security code. The default is 00 00 00.
- Press the Up-Arrow button on the keypad and press Enter at the Convert to Child option.
- Press the In button to confirm the conversion.
- Press the Down-arrow and select the option to Locate Parent By IP Address and press Enter.
- Enter the static public IP address of the Parent location.
- The clock will configure and reboot.
- A communication status symbol appears in the upper right of the clock’s display. The status should change to “d”.
- Repeat steps 4-10 for any additional Child clocks.
- At the Parent clock location, have someone log into the time clock’s Web page and go to Reports\Roster.
- The Child clock(s) should appear at the bottom of the Roster Report.

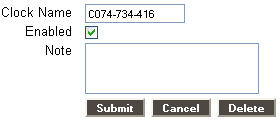
- Click on the clock to open the Edit a Clock window.
- Select the Enable option and Submit the changes.

- At the Child clock, the status should change from “d” to “+” after a few minutes. The Child clock is now linked to the Parent clock’s database and is ready to transfer information.
Additional multi-clock setup information can be found in your RTC-1000 user guide in Chapter 9: User Guide